i Short answer
Position sizing determines exactly how large a trade should be, calculated by working backward from your account's defined risk percentage and your strategy's stop-loss distance.
This ensures consistent, controlled risk exposure across every trade.
📋 ON THIS PAGE
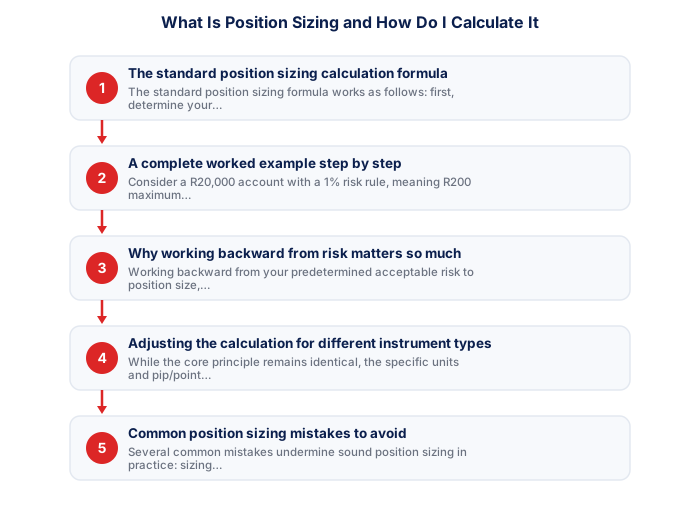
- The standard position sizing calculation formula
- A complete worked example step by step
- Why working backward from risk matters so much
- Adjusting the calculation for different instrument types
- Common position sizing mistakes to avoid
- Tools that simplify this calculation in practice
- Why position sizing breaks down below a certain account size
1. The standard position sizing calculation formula
The standard position sizing formula works as follows: first, determine your maximum acceptable monetary risk for the trade by multiplying your account balance by your defined risk percentage (for example, 1% of a R20,000 account equals R200 maximum risk). Second, determine your stop-loss distance in pips or points based on your strategy's specific technical analysis for this trade. Third, divide your maximum monetary risk by the monetary value per pip or point at a standard position size, then scale your actual position size accordingly to ensure your stop-loss distance translates to exactly your predetermined maximum risk amount.
This calculation deliberately starts from your acceptable risk and works backward to position size, rather than the reverse approach of choosing a position size first and seeing what risk results, this ordering, discussed in more detail in the next section, is genuinely important for maintaining consistent, disciplined risk management.
2. A complete worked example step by step
Consider a R20,000 account with a 1% risk rule, meaning R200 maximum acceptable risk per trade. Your technical analysis for a specific USD/ZAR trade suggests a stop-loss 50 pips away from your intended entry price. If, at your broker's standard position sizing, each pip of movement on a standard lot is worth approximately R20 (this exact figure varies by broker and account currency, and most platforms calculate this automatically), then a standard lot would put R1,000 at risk (50 pips multiplied by R20 per pip), considerably more than your R200 maximum acceptable risk.
| Variable | Value |
|---|---|
| Account size | R20,000 |
| Risk rule | 1% |
| Maximum risk per trade | R200 |
| Stop-loss distance | 50 pips |
| Approx. value per pip (standard lot) | R20 |
| Risk on a standard lot | R1,000 (exceeds the R200 limit) |
To bring this back in line with your predetermined risk tolerance, you would need to trade a smaller position size, specifically, one-fifth of a standard lot in this example, so that the same 50-pip stop-loss distance translates to exactly your R200 maximum acceptable risk, rather than the R1,000 a full standard lot would have put at risk.
- FSCA-regulated broker verified at fsca.co.za
- Demo account tested for minimum 60 days
- Trading plan written: entry, exits, position sizing
- Risk per trade defined (1-2% of account)
- Backup internet connection tested for load shedding
- Tax implications understood
This is the step that's easy to skip under time pressure, defaulting to a round, familiar lot size rather than the specific fraction the calculation actually calls for, and it's exactly where the discipline this formula provides tends to break down in practice. Rounding a calculated 0.2-lot position up to a more 'convenient' 0.25 or 0.3 lots might seem like a minor adjustment, but it directly increases your actual risk above the figure you deliberately chose, undermining the entire purpose of having calculated it in the first place.
3. Why working backward from risk matters so much
Working backward from your predetermined acceptable risk to position size, rather than the reverse, ensures your risk exposure remains consistent across every trade regardless of how far away a specific trade's stop-loss happens to be, a trade requiring a wider stop-loss (due to a more volatile instrument or a more distant technical level) automatically results in a smaller position size, while a trade allowing a tighter stop-loss results in a correspondingly larger position size, with both ultimately risking the same predetermined monetary amount.
This consistency is genuinely valuable specifically because it means your overall risk exposure doesn't inadvertently balloon simply because a particular trade happens to require a wider stop-loss, without this disciplined calculation approach, traders sometimes inadvertently take on dramatically different risk levels across different trades without realising it, undermining the consistent risk management this entire framework is designed to provide.
Over a series of trades, this consistency is what actually makes a strategy's statistical edge meaningful. A strategy's win rate and average reward-to-risk ratio are calculated on the assumption that each trade risks a comparable, predetermined amount; if position sizing varies haphazardly from trade to trade, real-world results can diverge substantially from what the strategy's backtested statistics would suggest, even if every individual trade decision was otherwise sound.
4. Adjusting the calculation for different instrument types
While the core principle remains identical, the specific units and pip/point values used in this calculation differ across instrument categories: gold might be calculated based on dollar movement per ounce rather than traditional forex pips, while index CFDs like the JSE Top 40 typically use index points rather than pips. Understanding your specific broker's exact calculation conventions for each instrument category you trade is necessary for applying this position sizing approach correctly across your full range of traded instruments.
Most modern trading platforms include built-in position size calculators that handle these instrument-specific calculation differences automatically once you input your account risk percentage and intended stop-loss distance, removing much of the manual calculation burden in actual day-to-day practice while still requiring you to understand the underlying principle clearly.
| Item | Detail |
|---|---|
| Regulator | FSCA, fsca.co.za |
| Exchange control | SARB, resbank.co.za |
| Tax authority | SARS, sars.gov.za |
| JSE hours | 09:00-17:00 SAST Mon-Fri |
| Best forex session | 15:00-17:00 SAST |
| CGT annual exclusion | R50,000 (individuals) |
It's worth actually testing your platform's calculator against a manual calculation at least once, rather than trusting it blindly from the outset. Confirming you understand what inputs it expects, and that its output matches your own working for a simple example, builds the kind of confidence that lets you rely on it quickly during live trading without second-guessing the number it produces.
5. Common position sizing mistakes to avoid
Several common mistakes undermine sound position sizing in practice: sizing positions based on a fixed lot size habit (always trading a standard lot, for example) regardless of the specific trade's stop-loss distance, which produces wildly inconsistent actual risk exposure across different trades; increasing position size after a string of wins out of overconfidence, a common trading psychology pitfall, rather than maintaining the consistent percentage-based approach regardless of recent results; and failing to recalculate position size as account balance changes meaningfully over time, continuing to use an outdated monetary risk figure rather than the current, accurate percentage of your actual present account balance.
Avoiding these specific mistakes requires treating position size calculation as a deliberate, repeated step before every single trade, rather than a one-time calculation performed once and then applied unchanged regardless of how circumstances and account balance evolve over time.
6. Tools that simplify this calculation in practice
Beyond built-in platform calculators, many traders use dedicated position size calculator tools, available as standalone web tools, spreadsheet templates, or sometimes built into third-party charting platforms, that allow quick, accurate calculation by simply inputting account balance, risk percentage, stop-loss distance, and the specific instrument being traded.
Regardless of which specific tool you use, building the habit of performing this calculation consistently before every trade, rather than estimating position size roughly or relying on memory or habit, is the genuinely important practice, the specific tool used matters far less than the underlying discipline of actually performing this calculation every time.
For traders who want to go beyond simple fixed-percentage risk, the Kelly Criterion offers a more mathematically grounded way to size positions based on your actual win rate and reward ratio, though most retail traders find a conservative fraction of the full Kelly figure far more practical than the raw calculation.
Position sizing calculates the exact lot size to risk a consistent percentage of your account per trade. On a R20,000 account risking 1%, the maximum loss per trade is R200 regardless of which instrument is traded.
★ Why It Matters
Worth double-checking specifically with volatile instruments: recalculate your position size using the instrument's current volatility (via ATR) rather than a fixed stop-loss distance you use for every trade, the same percentage risk rule applied with a stale stop distance can size a trade very differently than intended.
✕ Common mistakes
- Using a fixed stop-loss distance regardless of current instrument volatility. A volatility-adjusted stop better reflects genuinely current market conditions.
- Sizing positions based on a round lot number rather than the calculated figure. The mathematically correct size for your risk rule is often an oddly specific decimal.
- Not recalculating position size for every individual trade. A fixed size regardless of stop distance produces inconsistent actual risk.
- Ignoring combined risk when several positions are open simultaneously. Total exposure should be assessed across all open positions, not per trade.
7. Why position sizing breaks down below a certain account size
The formula works at any account size, but the result stops being tradeable below a point. On R10,000, risking 1% gives you R100 per trade, which supports a sensible stop on a micro or small mini position. On R1,000, that same 1% is R10 of risk, an amount the spread alone largely consumes before the market moves at all.
This is the arithmetic behind a great deal of retail account failure. Faced with a position size too small to produce a visible result, the natural response is to increase the risk per trade from 1% to 5% or 10%, which is the same as deciding that a normal run of five or six losses will remove most of the account. The alternative is to keep the money invested while building capital, and to practise the process on a demo account. What R1,000 can realistically do covers that path, and what traders actually earn sets out why a percentage target beats a rand target on a small account.
Key Takeaways
- Position sizing determines how large a trade to open based on your risk tolerance and stop-loss distance. Learn the standard calculation step by step.
- Position sizing determines exactly how large a trade should be, calculated by working backward from your account's defined risk percentage and your strategy's stop-loss distance.
- This ensures consistent, controlled risk exposure across every trade.
- The standard position sizing calculation formula.
- A complete worked example step by step.
Frequently asked follow-up questions
Do I need to manually calculate position size for every single trade?
While platform calculators can speed this up significantly, performing this calculation consistently for every trade, rather than skipping it for trades that feel obvious or urgent, is important for maintaining genuine risk management discipline.
Does position sizing change if I'm using higher leverage?
Leverage affects the margin required for a given position size, but the position sizing calculation itself, based on risk percentage and stop-loss distance, remains the same underlying principle regardless of the specific leverage used.
Should position size be the same for every instrument I trade?
No, position size will naturally vary between instruments given their different typical volatility, pip/point values, and your specific stop-loss distance for each individual trade, consistency should be in your risk percentage, not your raw position size.
What happens if I round my calculated position size up or down slightly?
Most brokers only allow trading in specific lot size increments, so minor rounding is normal and expected; rounding down slightly to stay within your risk limit is generally preferable to rounding up and exceeding it.
Can I use the same position size calculation for a demo account?
Yes, applying the identical calculation process on a demo account is actually a valuable way to build the habit before transitioning to live trading with real capital at stake.
