i Short answer
This ratio shows what proportion of your available margin is currently committed across open positions.
It helps you gauge how much genuine capacity remains for new positions before approaching margin call territory.
📋 ON THIS PAGE
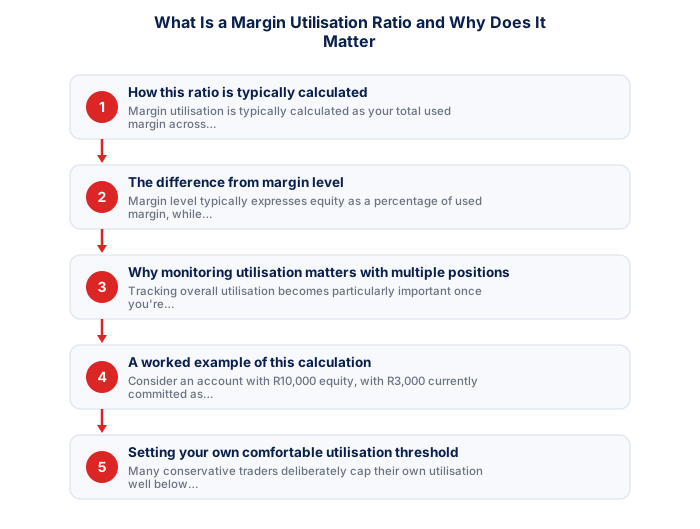
1. How this ratio is typically calculated
Margin utilisation is calculated as your total used margin across all open positions divided by your total equity or available margin, expressed as a percentage. If you have R10,000 in account equity and R3,000 is committed as required margin across your open positions, your utilisation is 30%. As you open more positions, add size, or as open positions move against you (reducing equity), the utilisation ratio increases.
The calculation differs slightly from margin level, which is a related but inverse concept. Margin level expresses equity as a percentage of used margin; utilisation expresses used margin as a percentage of equity. Both measure the same relationship from different angles, and some platforms display one while others display the other or both.
Understanding which figure your platform displays and how it's calculated for your specific account type removes ambiguity about how close to the margin call threshold you are at any given time. The terminology varies by broker, used margin, margin utilisation, free margin, margin level, and verifying the exact calculation your platform uses is straightforward through your broker's FAQ or support.
2. The difference from margin level
Margin level, often the figure platforms display most prominently, is equity divided by used margin, expressed as a percentage. A 100% margin level means your equity exactly equals your required margin, you're right at the threshold. A 200% margin level means your equity is twice your required margin, indicating reasonable buffer.
Utilisation is the inverse: used margin divided by equity. A 50% utilisation means half your equity is committed as margin. A 100% utilisation means all of your equity is committed, leaving zero buffer against adverse movement.
- P = Position size in lots
- R = ZAR amount at risk (1-2% of account)
- S = Stop distance in pips from entry
- V = Pip value per lot for this instrument
Set account risk %
Define maximum capital at risk per trade, typically 1-2%.
Measure stop distance
Find your stop-loss level on the chart before calculating size.
Calculate pip value
Use the instrument-specific pip value for your lot size.
Compute position size
Position size = (ZAR at risk) / (stop pips x pip value).
Confirm free margin
Ensure required margin fits within your available free margin.
Both convey the same information, how much of your capital is working as margin versus providing a buffer, but the framing differs. Margin level counts down toward a danger threshold at 100%; utilisation counts up toward a danger threshold at 100%. Understanding which direction your platform's figure counts in prevents misinterpreting your account status.
3. Why monitoring utilisation matters with multiple positions
With a single position, margin monitoring is relatively straightforward. With multiple simultaneous positions, utilisation becomes a critical aggregate figure: each individual position's required margin may seem small, but the combined requirement can represent a significant proportion of your total equity before you're aware of the cumulative picture.
A trader with five positions, each using 15% of their equity as margin, has reached 75% utilisation across the portfolio, a level where a moderate adverse move across all positions simultaneously could trigger margin calls across multiple holdings at once. Portfolio-level utilisation monitoring makes this aggregate exposure visible in a way that position-level monitoring doesn't.
| Account | Risk % | Max loss (ZAR) | At 1:30 leverage | Notional position |
|---|---|---|---|---|
| R50,000 | 1% | R500 | 1:30 | R15,000 |
| R50,000 | 2% | R1,000 | 1:30 | R30,000 |
| R50,000 | 5% | R2,500 | 1:30 | R75,000 |
| R100,000 | 1% | R1,000 | 1:30 | R30,000 |
- Access larger positions with less capital
- Amplifies returns on winning trades
- Short-selling available without share borrowing
- Losses amplified equally, 10x leverage, 10x loss
- Overnight financing reduces long-term returns
- Margin calls can force closure at worst moments
The practical risk of not monitoring aggregate utilisation is that opening a new position when already highly utilised leaves no buffer for normal adverse fluctuations on existing positions. A setup that looks attractive in isolation becomes problematic when it pushes overall utilisation into dangerous territory.
4. A worked example of this calculation
With R10,000 in account equity and R3,000 committed as required margin across open positions, margin utilisation is 30%. This means 70% of your equity remains as free margin, a comfortable buffer against adverse moves. If those same positions moved against you and your equity fell to R7,000 while required margin remained at R3,000, utilisation would rise to 43%.
Now suppose you open two more positions requiring R2,000 each in margin. Required margin rises to R7,000. With current equity of R7,000, utilisation is 100%, you're fully committed. Any further adverse move reduces equity below required margin, triggering a margin call.
Working through these scenarios with your own account figures before you're in a stressed position is more useful than learning the implications during a drawdown. Understanding precisely how utilisation responds to equity changes and additional position sizes clarifies what buffers you genuinely have.
| Item | Amount |
|---|---|
| Account equity | R10,000 |
| Margin committed to open positions | R3,000 |
| Margin utilisation ratio | 30% |
| Capacity still available | 70% |
5. Setting your own comfortable utilisation threshold
Many conservative traders self-impose a maximum utilisation threshold, often between 20% and 50%, and refuse to open new positions that would breach it regardless of how compelling the setup looks. This hard limit functions as a structural safeguard against the gradual over-extension that often precedes forced margin calls.
The appropriate threshold varies by trading style and risk tolerance. A position trader holding positions for weeks or months, where each position might experience substantial adverse movement without being wrong, benefits from lower utilisation than a scalper whose positions typically close the same day. The key principle is that the threshold should be set conservatively enough to survive the realistic worst-case scenario for your typical position count and holding period.
- Confirm account equity
- Calculate 1-2% risk in ZAR
- Identify stop-loss level from chart
- Measure stop distance in pips
- Look up pip value for instrument
- Compute position size
- Verify required margin fits free margin
Building this threshold into your routine as a non-negotiable rule, not an aspiration, is the point where it becomes genuinely protective. A self-imposed rule that gets overridden when a good setup appears isn't a rule; it's a suggestion. The value of the threshold is precisely that it applies even when ignoring it feels tempting.
6. Where to find this figure on your platform
Most trading platforms display margin-related figures in the account summary section, typically visible as a footer bar at the bottom of the MetaTrader interface or as a dashboard panel in web platforms. The figures shown usually include equity, used margin, free margin, and margin level, from which utilisation can be calculated directly if it's not displayed explicitly.
MetaTrader users will find these figures in the Trade terminal at the bottom of the screen: Balance, Equity, Free Margin, and Margin. Margin utilisation can be calculated as (Margin / Equity × 100). Some platforms display this figure directly; others require the simple division.
Worth tracking as a personal rule: establishing a maximum margin utilisation threshold you won't exceed regardless of how attractive a new setup looks. The threshold should be conservative enough to absorb a meaningful adverse move across all current positions without triggering an automatic stop-out. Setting this in advance, and treating it as firm rather than advisory, removes a discretionary decision from exactly the moment it's most likely to be made poorly.
✕ Common mistakes
- Only checking this ratio when wanting to open a new position. Ongoing monitoring reveals a thinning buffer before it becomes urgent.
- Not setting a personal maximum utilisation threshold in advance. A predetermined limit prevents reactive decisions when utilisation is already high.
- Assuming low utilisation today guarantees safety during a fast-moving move. Utilisation can shift quickly as positions move against you.
- Ignoring how adding one more position affects overall utilisation. Each new position should be assessed against the combined, not isolated, picture.
Key Takeaways
- This ratio shows what proportion of your available margin is currently committed, helping you gauge how much capacity remains for new positions.
- This ratio shows what proportion of your available margin is currently committed across open positions.
- It helps you gauge how much genuine capacity remains for new positions before approaching margin call territory.
- How this ratio is typically calculated.
- The difference from margin level.
Frequently asked follow-up questions
Is there a universally recommended maximum utilisation percentage?
There's no single universal figure; this depends on your own risk tolerance and trading style, though many conservative traders maintain meaningful buffer well below maximum capacity.
Does utilisation change automatically as position values fluctuate?
Yes, since this reflects your current equity and used margin, both of which change as open position values move, this ratio updates continuously rather than remaining fixed.
Can I set an alert for when my utilisation reaches a certain level?
Some platforms offer this kind of notification functionality. Checking your specific platform's settings confirms what's available.
Does this ratio account for unrealised profit on open positions?
Generally yes, since equity typically includes unrealised profit and loss, meaning a currently profitable position can improve your overall utilisation ratio even without closing it.
Should beginners specifically monitor this metric closely?
Yes, this provides a useful, consolidated view of overall account risk that's particularly valuable while still building broader risk-management discipline.
